PRESENTING YOUR PROJECTS
Here is a video tutorial on how to present at Virtual GLOW43, detailing how to upload and maintain your projects on our Open Science Framework repository. Additional information on these topics, as well as a walkthrough on how to record your own project presentations, are available further below.
Many thanks to everyone who tuned into the live version for their questions and feedback!
The GLOW43 OSF repository is the starting point for every poster, main colloquium talk or workshop presentation. Most materials should be accessible on the repository’s page directly, but you may also add links to additional materials and communication channels in your individual OSF projects.
A project page should minimally provide a .pdf copy of your slides, poster, or handout. Any supplementary materials in .pdf format are also welcome. In addition, please consider uploading:
- an .mp4 video of you discussing or narrating your presentation. You are free to choose whether to record a video of yourself speaking, record your voice on the slides or a hybrid of the two (with speaker and presentation alternately or simultaneously onscreen).
- A text transcript of your video.To maximize accessibility of your presentation, consider including a text transcript of your video. We are unable to offer automatic transcription services at present, however.
- You may also look into automatic generation of closed captions.
Please do not feel obligated to make the video component if you are uncomfortable with this option or simply prefer not to for any reason; we suggest this as one way to recapture the face-to-face interaction of a physical conference, but uploading your hand-out, slides, paper draft (for a talk/poster) or poster (for a poster) counts as having presented at GLOW 43.
The deadline for uploading the materials to the repository is set to April 7, 23:55 CEST (UTC+2).
The content of this page is partially adapted from CUNY2020 at UMass.
UPLOADING AND MANAGING CONTENT ON OSF
Go to the repository’s main page and click on Add poster or talk to open a project for your own contribution to the conference. This will provide you with the instructions on how to submit your files:
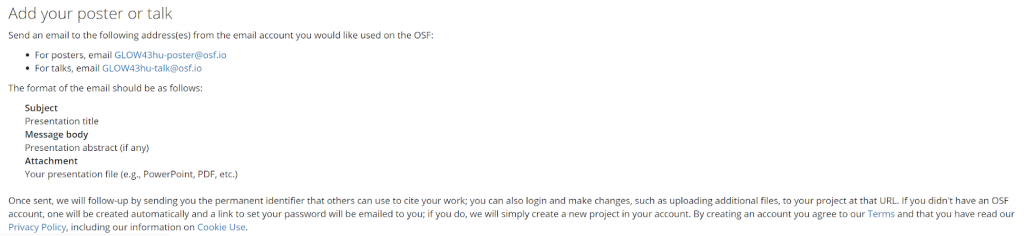
To open a new project, send an email to GLOW43hu-poster@osf.io for poster presentations, and GLOW43hu-talk@osf.io for talks (workshops and main colloquium).
Points to note:
- Make sure that the email subject line is the project title as you have it in the GLOW43 programme supplemented with one of the following prefixes (in capital letters): COLLOQUIUM-, WORKSHOP1-, WORKSHOP2-, WORKSHOP3-, reflecting the programme your project is part of. The subject of your email should look something like this: COLLOQUIUM-Example Talk. This is how the project will be named on OSF, and it’s how attendees will find it in the list.
- Please make sure that the email address you send your project with is the one that you wish to register with (or already have an account on) OSF with! Otherwise, you will not be able to add video and transcript to your poster’s OSF site without creating a new OSF account.
- Please delete your email signature before sending (e.g. Best, yourname). All of the text in the email will be uploaded as the abstract of your repository, including any signatures that are there.
- Emailing your project to OSF will automatically create an account for you. You may then log in any time and edit your poster’s project page, including deleting files, uploading new files, adding links and dates for your potential online sessions and so on.
You should receive an automated confirmation email containing your project’s custom URL shortly after your submission. You can now freely modify any element of this subpage, including the option to make the project private. Here is an overview of a typical project page:
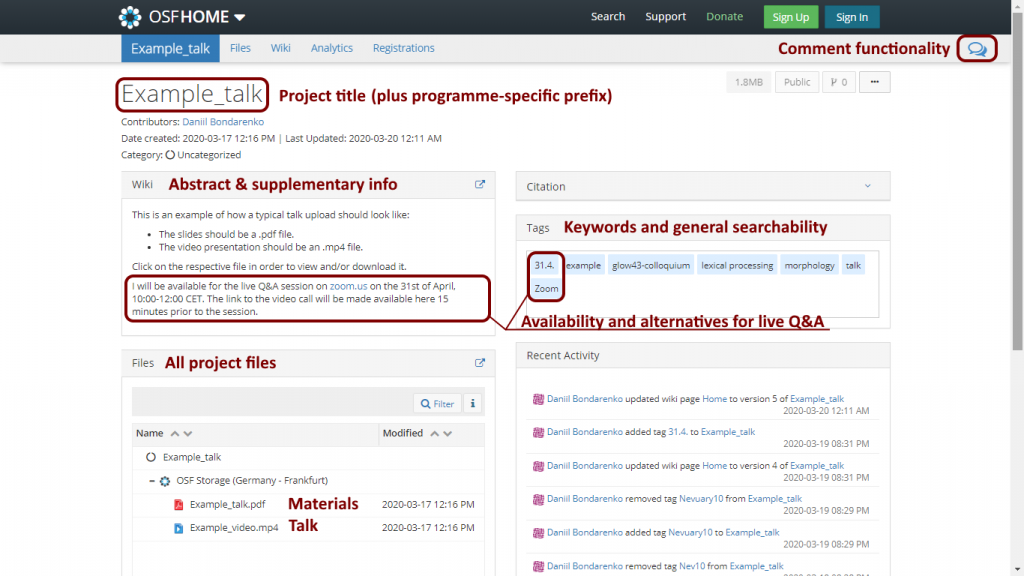
Please provide a few keywords for your project in the Tags section and add one of the four GLOW-specific tags, depending on what programme the project belongs to:
- glow43-colloquium
- glow43-workshop1
- glow43-workshop2
- glow43-workshop3
This, together with the aforementioned title prefixes, will help your audience find your project. Additionally, please make yourself acquainted with OSF’s comment functionality by clicking on the speech bubble in the top right corner – this is where most attendees with leave their questions, comments and suggestions.
The decision on how to engage with your audience is yours, but we encourage our presenters to find a time slot within the timeframe of the conference in order to interact with their audience in real time. While OSF’s comment sections will probably serve as the main loci of discussion, presenters are free to use other communications channels like Skype, Zoom, etc. as long as their decision is clearly indicated on the project’s subpage. Ideal places to provide such information would be the Wiki and Tags panels (see example above). Tweeting about your project with the #GLOW43 hashtag can also help with keeping your fellow conference participants informed.
More information on exploring and engaging with others’ projects is available here.
If you are having difficulties with submitting your files or modifying your project page, please contact us at glowlinguistics43@gmail.com for support.
RECORDING YOUR PROJECT
Talk presenters can, if they wish, record their own talk and/or poster presentation. Please note that the recording time for main colloquium talks has been set at 45 minutes max, for workshop talks at 30 minutes max. The recording of your poster presentation is limited to 5 minutes.
If you want to create a short video accompanying your slides, you may do so in any way you would like: show your face, don’t show your face, show a nice background, record on your slides, or any combination of these!
We are happy for you all to get creative and have fun with this, and use whatever software you like. However, we do have one request: please make (or convert) your video to .mp4 format and upload a copy of this .mp4 on the OSF for archival purposes. Note that OSF allows uploading files of size up to 5GB. While this should be more than enough for a 45-minute video, please consider compressing particularly large video files in order to accommodate attendees with low internet speeds.
In what follows, we give you a few pointers on how you can record your talk/poster and/or yourself.
1. Making videos in Quicktime/iMovie
Mac users have the option to make movies using Movie, QuickTime Player, and even just the camera functionality on your phone. Here’s how to use Quicktime to make a screen+webcam video:
- Open Quicktime.
- Go to file > new movie recording, then to view > float on top. Position the image where you want it on the screen.
- Go to file > new screen recording. Click the down arrow next to the record button. Select internal microphone as sound source, then press the record button.
- Make your slide(s) full screen. Now give your talk.
- When you’re done, minimize your slides. You’ll see a little record button on the upper right app bar – click it. This will stop the recording.
- Save the file to any directory.
You will then need to convert the Quicktime movie to .mp4 format. Here is one way to do it:
- Open iMovie.
- Go to Projects, then Create New, then Import Media.
- Import the file you just made.
- Go to file > share > file.
- Select Quality:High and Compress:Faster.
- Save it. It will now save as an .mp4.
2. Recording your slides (narration)
PowerPoint or Keynote users can record their voice on their slides and then save their talk in a .mp4 file.
→ For PowerPoint users:
- In the toolbar, select Slide Show > Record Slide Show.
- Proceed to talk. Note that you can pause the talk during the recording.
- Once your recording is over, select End Show in the upper-left corner of the screen.
- Save the new slide timings.
- Go to file > Export > File Format > MP4.
- Save it. Your talk is now saved as an .mp4 file.
→ For Keynote users:
- In the menu bar, select Play > Record Slideshow.
- Press the record red button at the bottom of your screen. A countdown of three seconds should appear.
- To end the recording, press the same red button again.
- Go to file > Export to… > Movie.
- Select the 1024×768 format and save your file.
- To export your file to .mp4, find your file on Finder, select your file and press enter.
- You should now be able to edit the name of your file.
- add “.mp4” to the name of your file. A window should pop up asking you if you’re sure about wanting to change the extension.
- Select .mp4 and save your talk.
3. Making videos in OBS
Here are instructions for making videos with OBS, a platform-independent, open source, free piece of software for making .mp4 videos (also, see here for a tutorial on the basics of OBS):
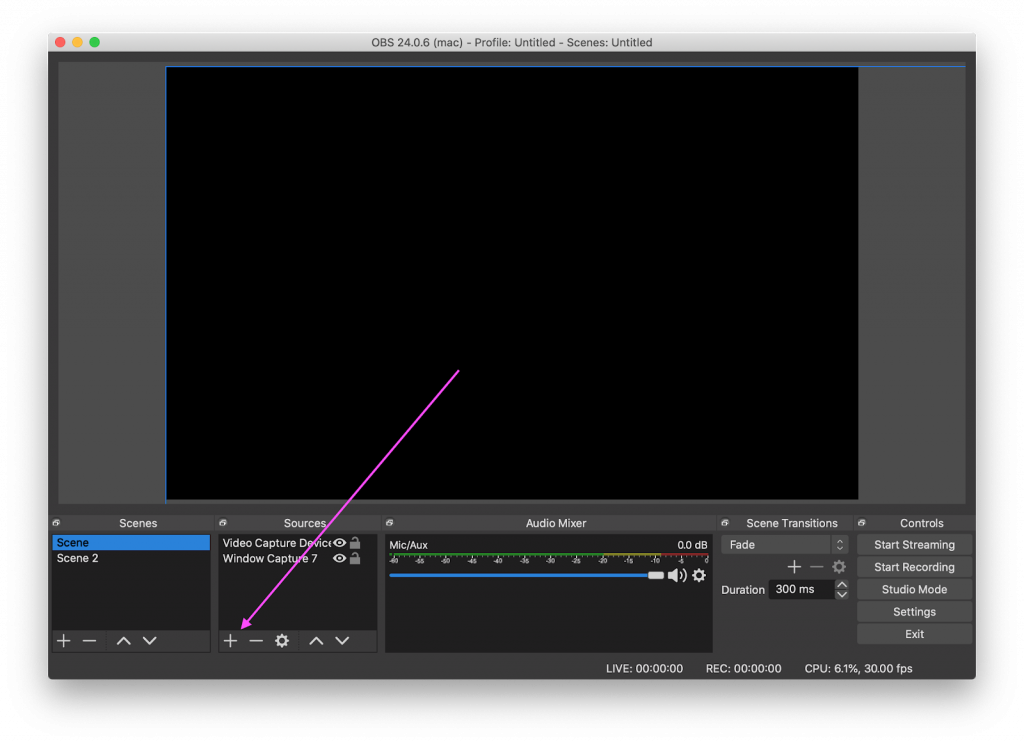
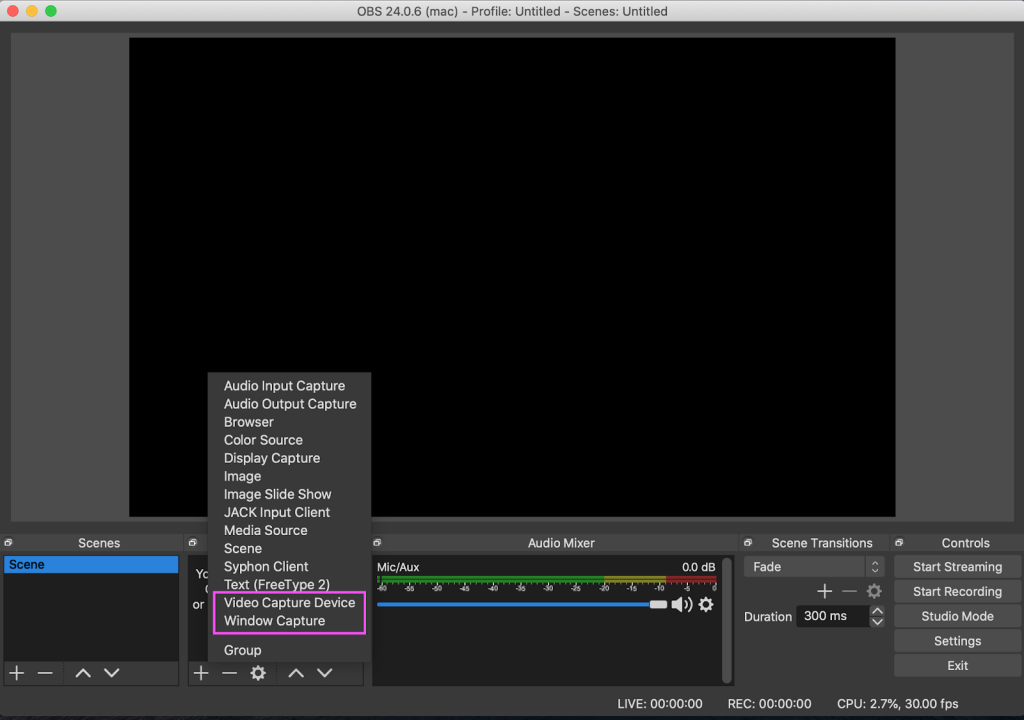
- Create your OBS scene by adding a Window Capture source to mirror your poster and Video Capture Device source to record you. First, create new sources:
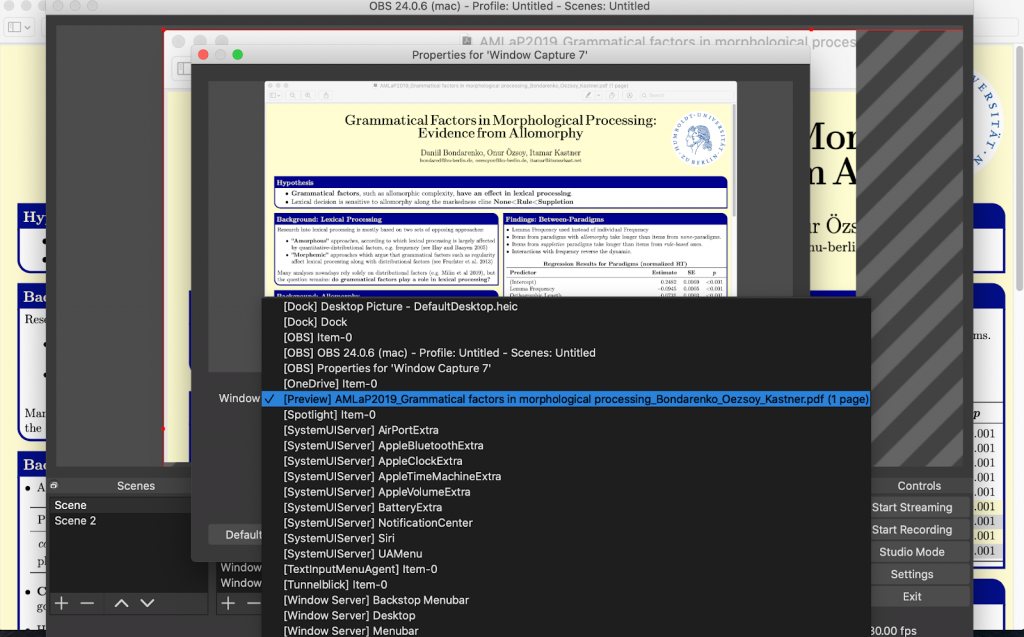
- Then select Window Capture:
- Choose the application that has your project material:
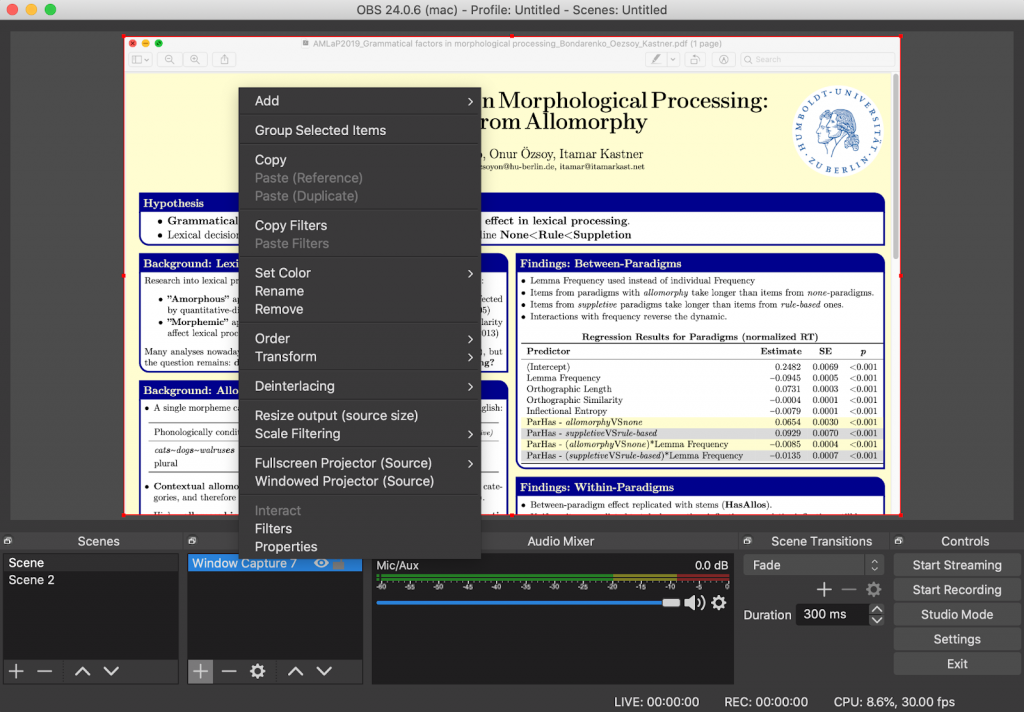
- Right-click to resize the scene by selecting Resize output (source size):
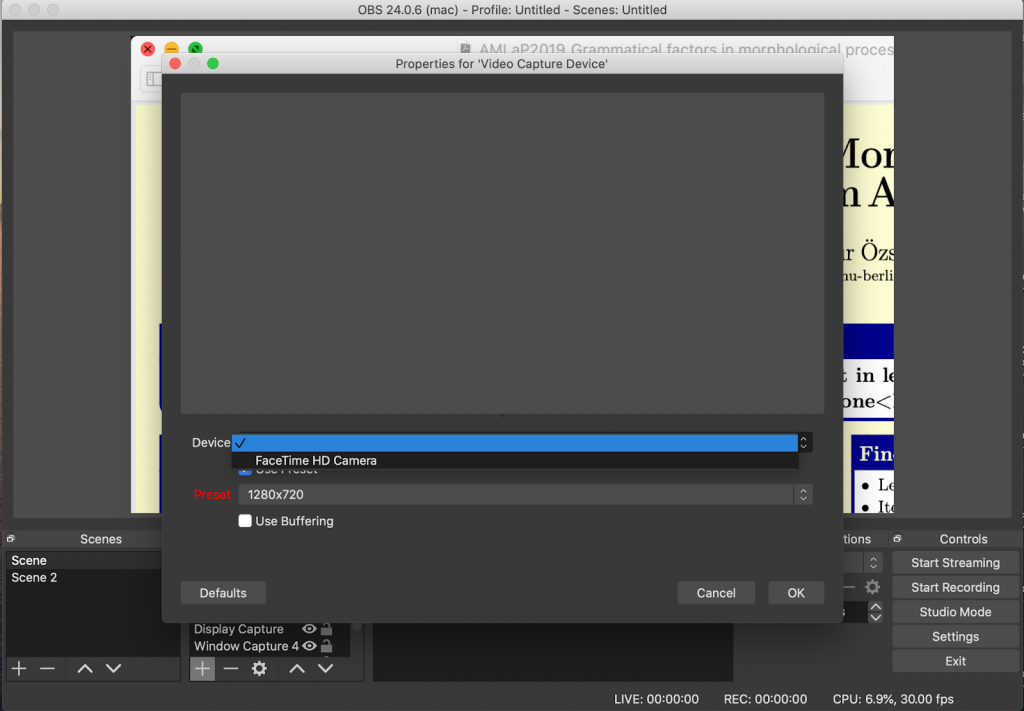
- Create a video device capture source:
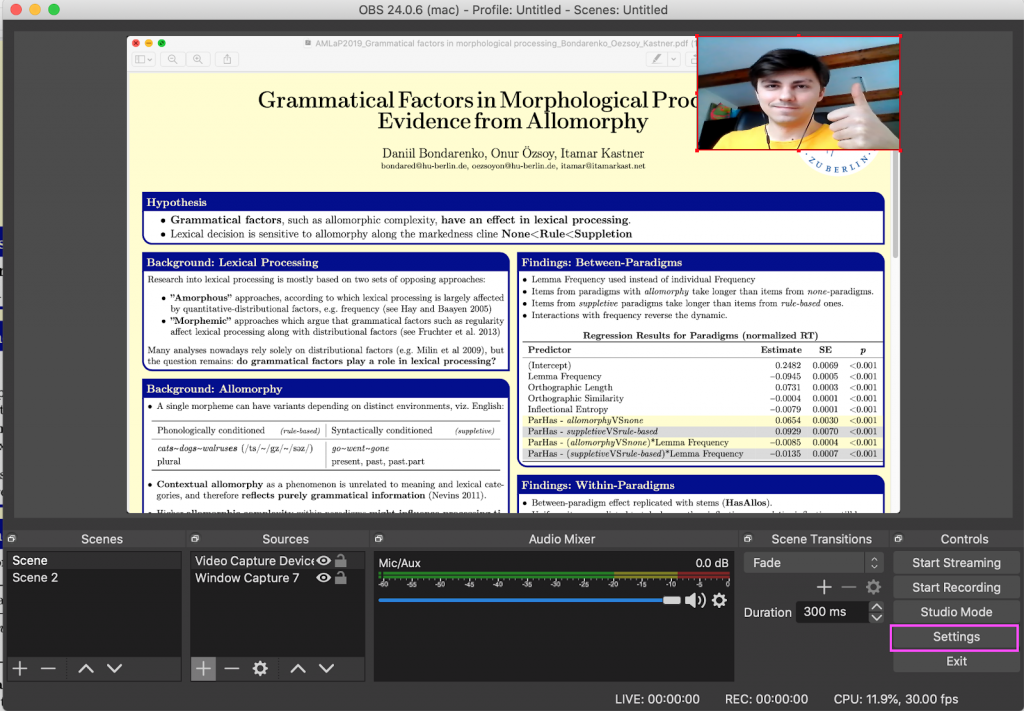
- Resize your video source as needed
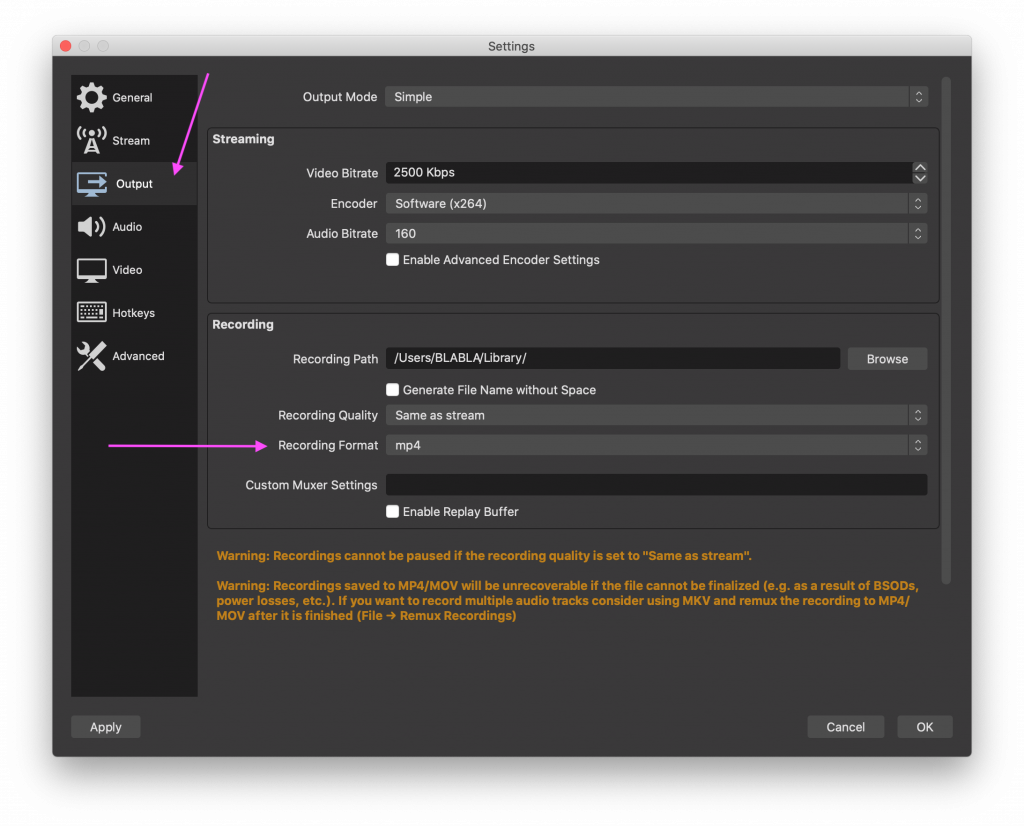
- Now change the recording settings so that you are recording an .mp4 file. Select Settings:
- In the Output settings change the recording format to .mp4:
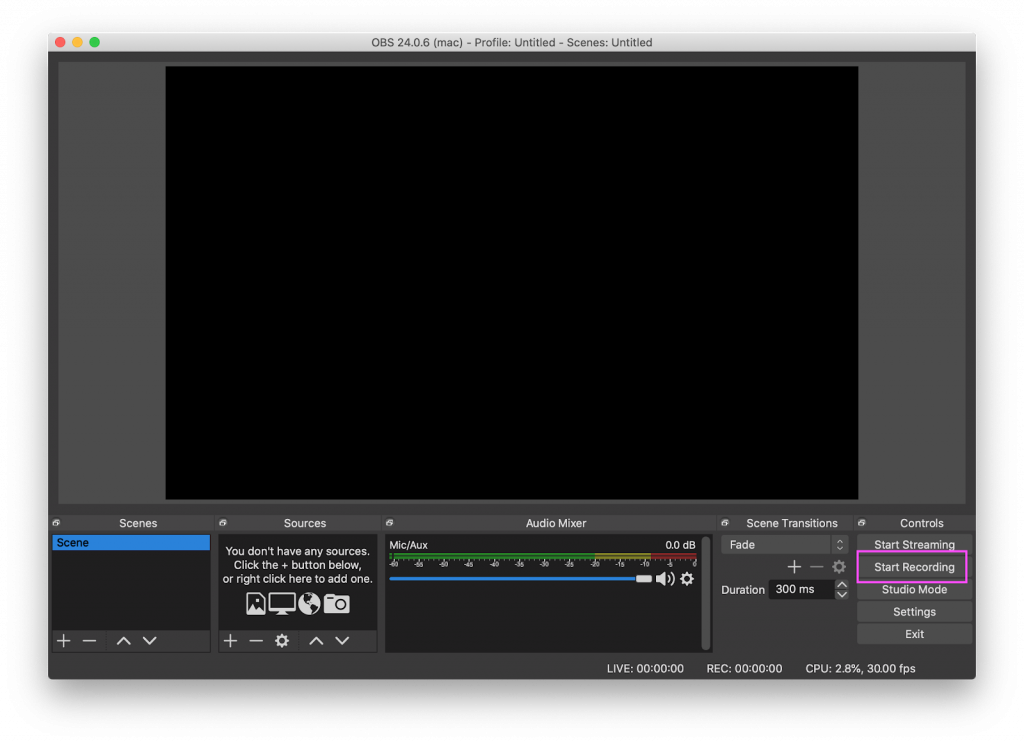
- Now you can record your video!
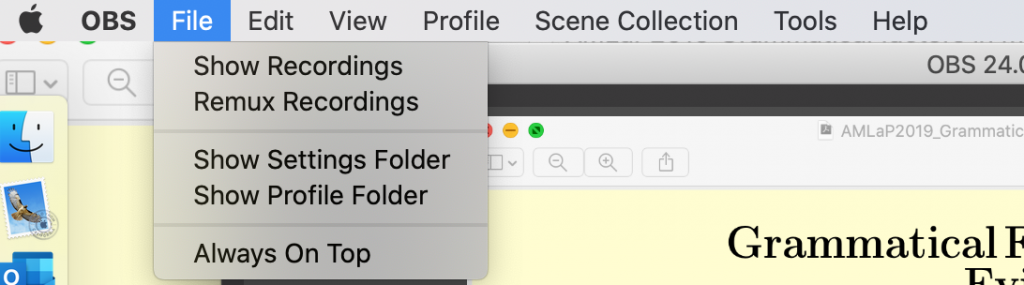
- After recording, you can access the video in your OBS Files and save it to a convenient directory.
Done! Now you can upload your video to the GLOW 43 OSF meeting.